Posted June 14, 2013
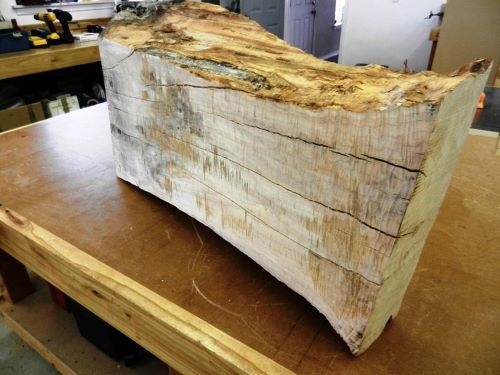
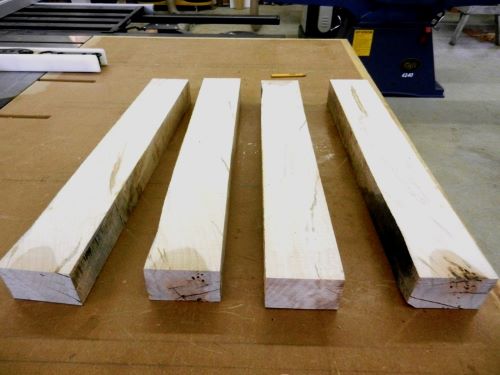
Let's start with a Maple Slab... A friend gave me a slab of Western Big Leaf Maple that he had brought over from the Seattle. It was nicely figured, but was highly checked and twisted, my thinking initially that it was destined for our firewood bin. Through some careful bandsaw work, I was able to salvage 4 nice, thick pieces for legs on a potential project. As the length was limited on the slab, it would need to be a fairly short piece of furniture.
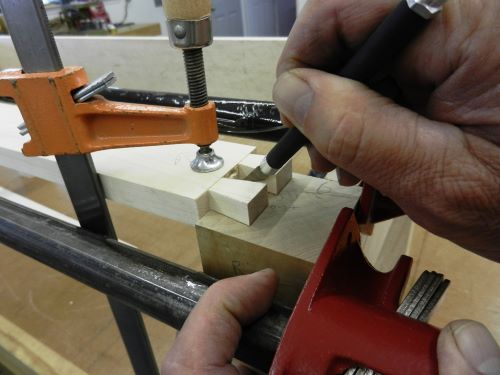
Hand planing the maple legs reveled just how much figure was present in the wood and inspired me to try to find some comparable maple for the rails and aprons. Having no more of the western maple, I settled on some eastern bird's eye maple as a suitable mate for the legs. The side and back rails are mortised into the legs before being tapered. The front bottom blade is also mortised into the front legs. For this project, a little something different, as I cut all of the tenons with a table saw dado stack instead of the tenon jig. This seems to be a real time saver and I'm quite pleased with the results.
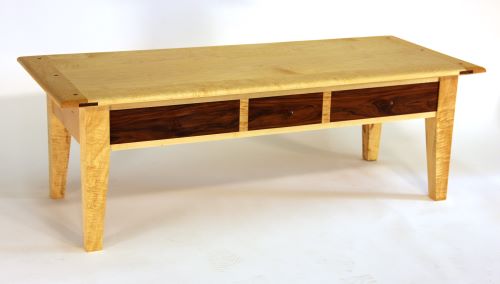
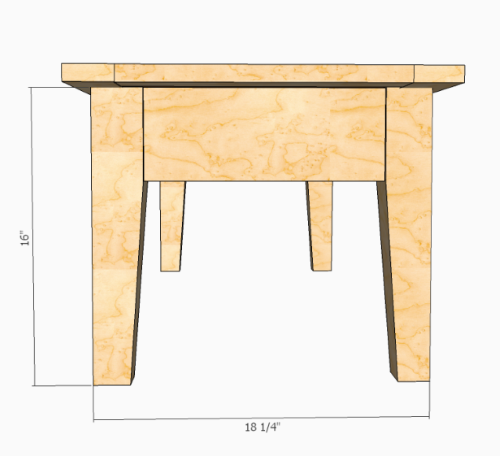
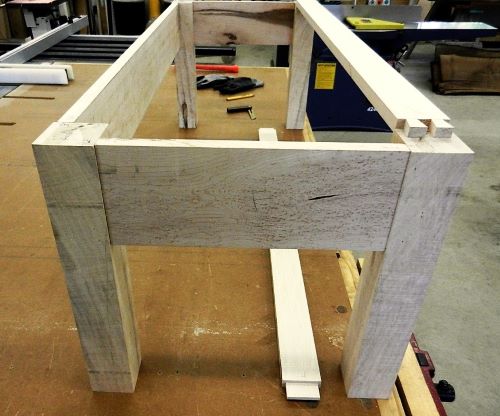
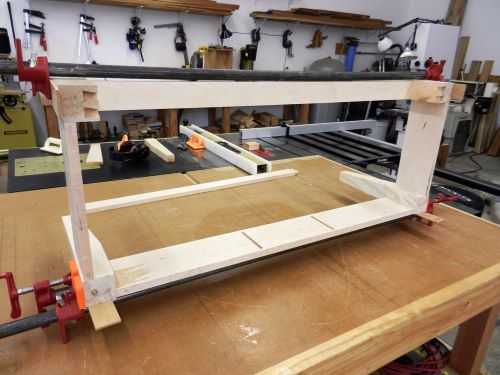
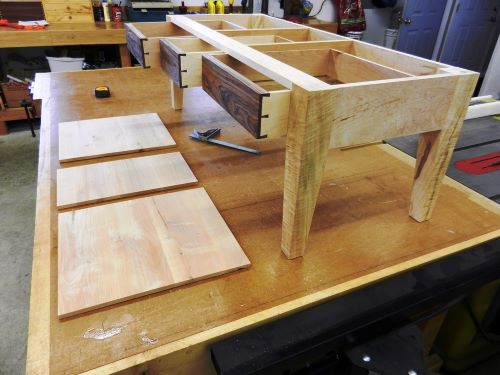
The top stretcher is fitted with double dovetails into the top of the front legs, to add mechanical rigidity to the table. I scribe the dovetails onto the leg tops with a knife and then rough-cut them out with a small router and finish cut them with a chisel. After tapering the legs and mortising the back rail for the drawer dividers, the base is glued up.
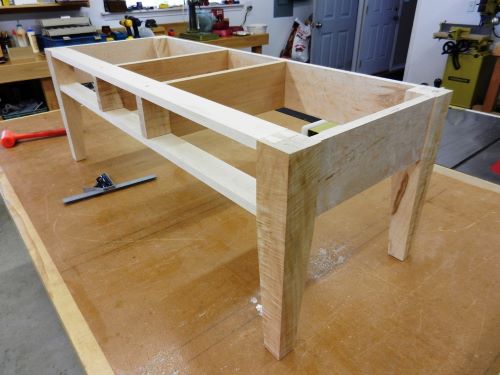
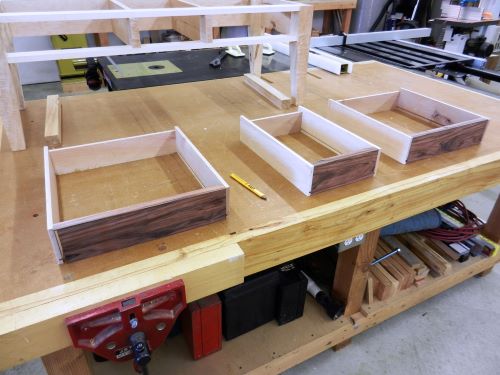
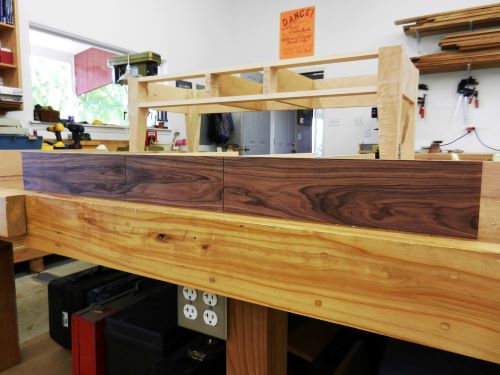
After initial glue up of the base, I added the drawer dividers, which are pieces of alder that have small pieces of maple biscuted to the front ends. The dividers are attached to the back rail with mortise and tenons and sandwiched between the front lower blade and top stretcher. A screw on the top and underside is added to ensure good pressure and alignment while the glue is setting. I believe that drawer fronts of contrasting woods can add some pop to a piece. Some woods seem to work a lot better than others when placed side-by-side. Originally, I had planned to use some Pacific Madrone for the drawer fronts on this table, but found it not to contrast sufficiently with the maple. I'm not a big fan of working with tropical exotics -- wild & woolly grain can make for difficult planing and dust that can be hazardous to health. But having on hand some beautiful Bolivian Rosewood that I've been moving around for years, I decided to try it for some drawer fronts on this table. I was able to choose a single piece in order to maintain continuous grain across all three drawer fronts.
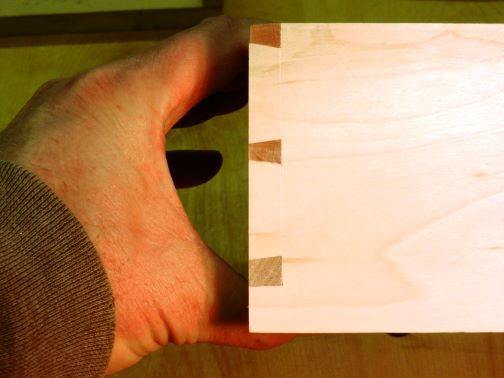
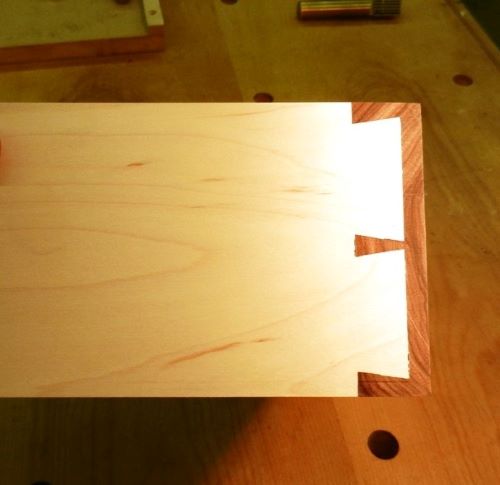
I had also planned to use some western alder for the drawer sides, but am still drawn to the crispness of hard maple for those pieces. While a little more difficult to work with, I like the clean and contrasting dovetails that can be cut in the maple. These half-blind dovetails on the drawer fronts were fashioned using the same techniques as in my cherry chest, that is, a combination of hand cut, bandsaw, and router to remove some of the waste. The drawers required only minor hand-planing of the sides and front to get a nice fit in their openings, as I'm finally getting good at building a drawer to fit from the beginning. Having nice square openings and drawers certainly helps as well. I did stay with the alder for the drawer bottoms, as it works well as a secondary wood for this purpose.
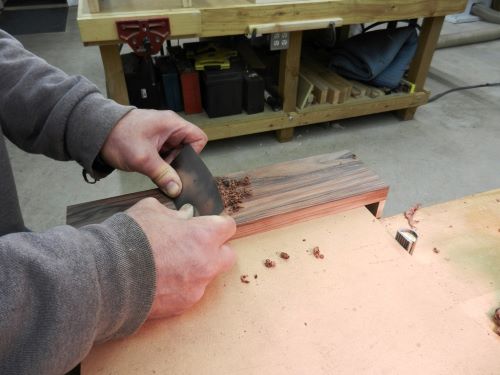
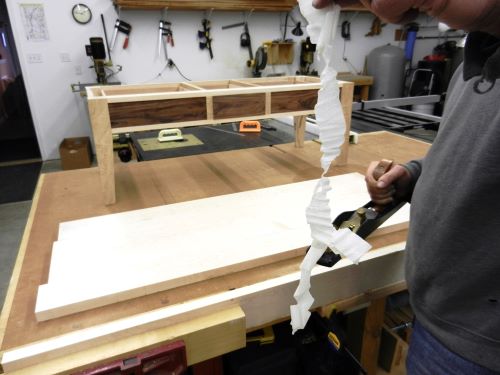
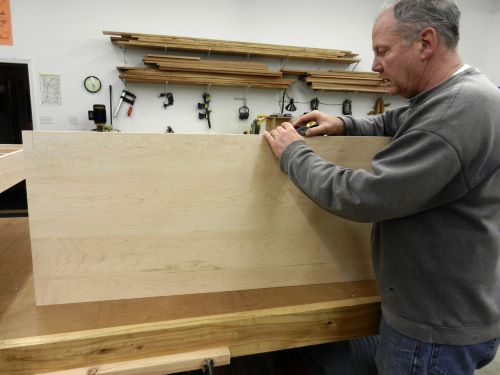
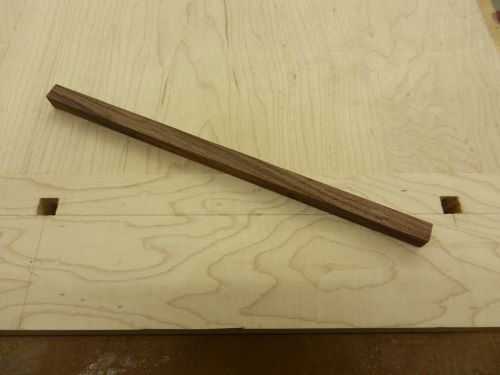
Working with tropical hardwoods will inevitability lead to some scraper work, as the grain doesn't always respond perfectly to my planes. These particular pieces of Rosewood have a certain rowed structure -- grain sloping in strips alternately one way and another. They certainly meet Krenov's definition of an "unfriendly wood". On the other hand, after gluing together some 5/4 hard maple for the table top, it is a true joy to plane, yielding nicely to my sharp smoother and producing perfect ribbons of microscopically thin silk. The top is made from solid 1 1/8" rock maple--not an easy slab of hardwood to maneuver around. The ends are breadboarded and pegged with square pieces of rosewood. I also inserted rosewood splines into the outer intersection of the breadboard and top, both for affect and strength on the ends.
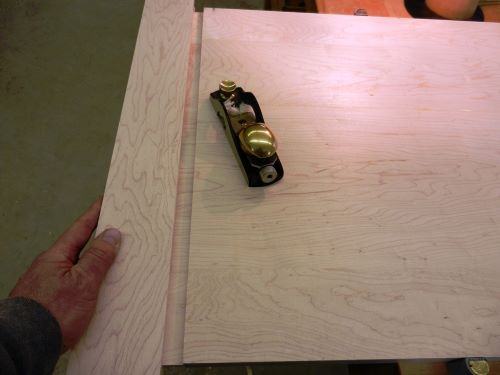
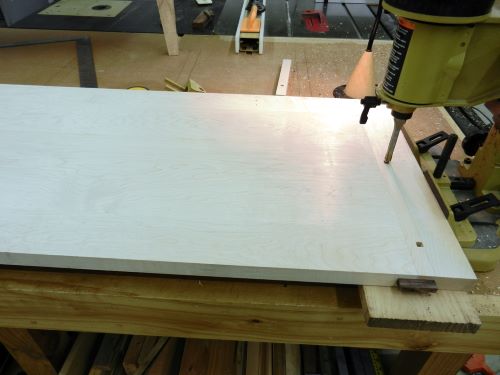
I cut the spline on the end of the top to accept the breadboard end with a dado on the table saw and do the final thickness adjustment with a small rabbet plane. After attaching the breadboard, holes for the square pegs are done with a 3/8" bit on the hollow chisel mortiser.
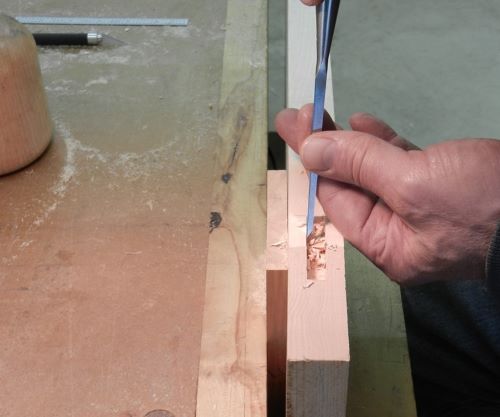
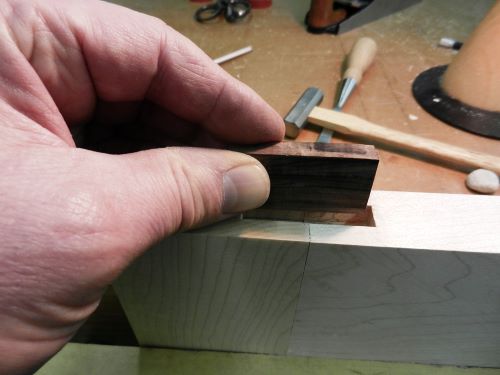
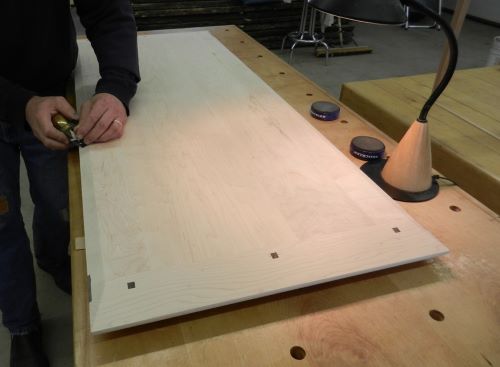
Pegs are pounded into place through a groove in the dadoed top end that allows the breadboard end to move, as it will, depending on temperature and moisture throughout the year. Grooves for the rosewood splines on the top sides are cut with a chisel. The bottom surface of the table top has a slight bevel on the sides and little larger bevel on the ends. I rounded over the entire top-edge with a hand plane and sandpaper, adjusting the radius as I went to get the desired effect.
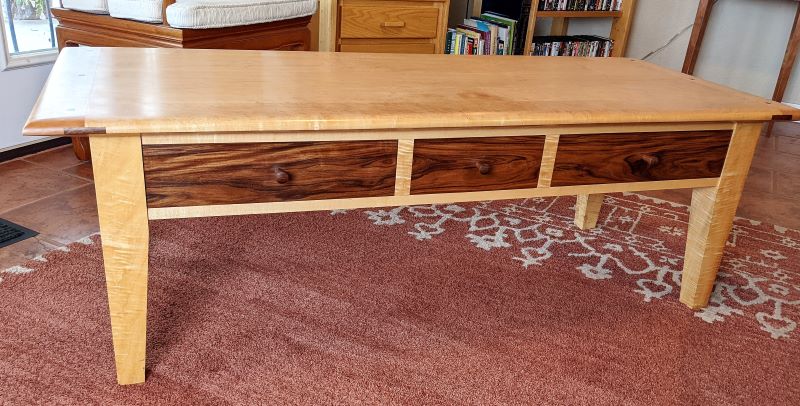
For drawer knobs, I turned several styles using different woods, before deciding on ones made directly from the rosewood for the best fit. After applying several coats of wipe-on tung oil finish, sanding to about 400 grit between coats, the piece is complete. This table ended up with 6 different species of wood: western big-leaf maple (legs), eastern hard maple (top and drawer sides), Bolivian rosewood(drawer fronts and knobs), western alder (drawer bottoms), Alaskan birch (drawer spacers) and persimmon (drawer slides).
Back To Top Home